How to Install and Use the YopMail Plugin
By now, you may feel like you’re getting the hang of YOPmail’s disposable email addresses. Chances are you’ve picked an address that you like (or maybe even multiple addresses!), and depending on your internet habits, you could be checking it on a daily basis. Once you get to this point, there is a cool feature from YOPmail that will help you do this more efficiently: the YOPmail plugin browser extension.
The YOPmail plugin is easy to install and use, and comes in very handy if you want to check your temporary email accounts on a regular basis. It is especially useful for people with multiple “favorite” accounts (i.e. @yopmail.com addresses they habitually use).

In this tutorial, we’ll go over what the YOPmail browser plugin does, how to install it and how to use it to check your disposable email accounts faster than ever.
What is the YOPmail browser extension for?
Here’s the basic idea behind the plugin. If you use YOPmail often, you have to go to the website, enter your email address of choice, and click the “Check Inbox” button every single time you want to check or use the account. Then, if you use multiple accounts, you have to go back to the home page and repeat the process to get into every account. It’s a bit inefficient, considering that YOPmail email accounts aren’t password-protected so you don’t even technically have a login procedure to go through.
But if you look on the yopmail.com homepage, in the left sidebar, there is an option called “Plug-in & Widget”. The description given is “Extensions for easy access to your YOPmail inbox”. You can click on this link to get more information and the download link. Don’t worry; we’ll go through all that later, step by step.

Once you install the YOPmail plugin in your browser (Firefox or Internet Explorer), it will be added as a search engine option in your browser’s tool bar. This lets you type in your temporary email addresses and go directly to their inboxes no matter what website you are on, because it’s embedded in your toolbar.
How to install the Yopmail plugin browser
Go to the yopmail.com home page and find the “Plug-in & Widget” section as described above. Click on it to go to the page with the download links for the browser extension. Here’s what it looks like:
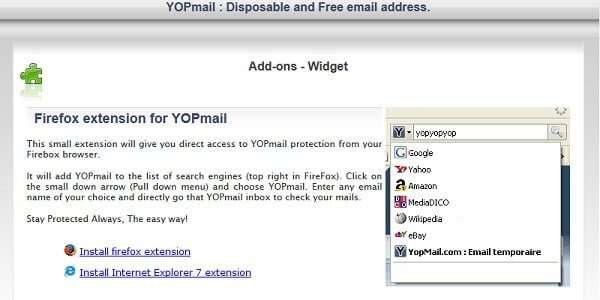
I use Firefox, so the rest of this tutorial will show images that might be specific to that browser. But if you use IE, the overall process is similar enough that this is still worth reading. In my case, I will click on the link that says “Install firefox extension”.
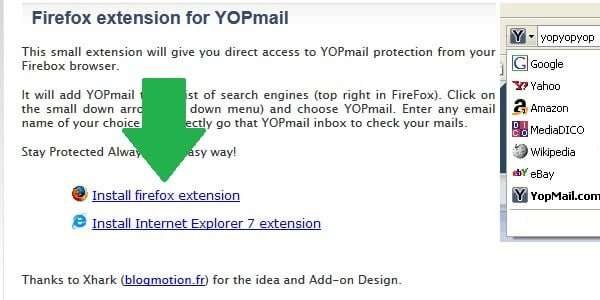
This isn’t technically a file to install, so you might be surprised when you don’t get a popup asking if you would like to save the file. Instead, you will see a window asking if you want to add YOPMail to the list of search engines in your browsers toolbar. Click the “Add” button (or “OK” or “Accept”, as the case may be).

Note: if you don’t see this window pop up right away, try turning off any ad-blocker or popup-blocker programs you have running in your browser. I had to disable ad-block and click a couple of times before I got it to do anything.
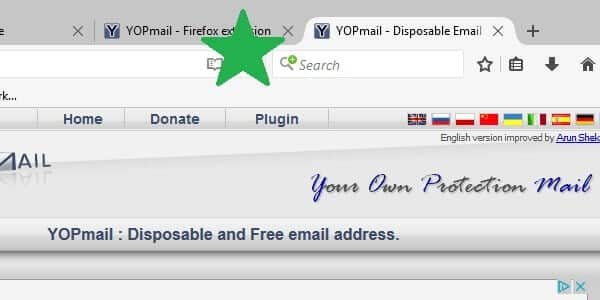
After you click “Add”, it might not look like anything has changed. If you look up here in the search box of my toolbar in Firefox, it looks the same as it did before.

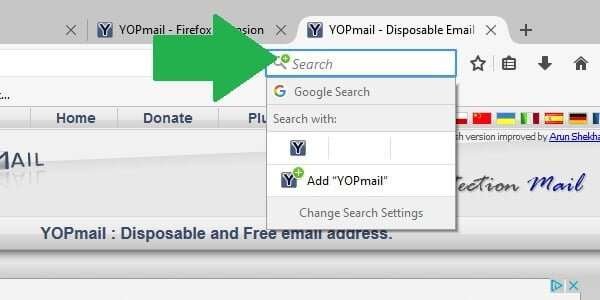
However, as soon as I open a new tab, the search box has been updated. It now includes a plus sign, indicating that there are multiple search engine options to choose from.
In the future, this plus sign might not be visible, but if you move your cursor over the magnifying glass icon, a small arrow should appear, meaning that you can click it to open a dropdown menu of options.
How to use the YOPmail plugin to check email
Now, let’s see this baby in action. First, type your YOP disposable email address into the search box of your browser’s toolbar (next to the URL bar, usually). As usual, I’m using any-temporary-email@yopmail.com.

Next, click to open the dropdown menu of search engines if your browser didn’t automatically do it for you. Click on the “Y” icon for YOPMail. Effectively, what this tells Firefox to do is “search YOPMAIL for any-temporary-email@yopmail.com”.

You’ll probably get a white screen with a URL that says something like “yopmail.com/en/?login=any-temporary-email…”. Depending on your connection speed, this screen may stick around for a few seconds while you are redirected. But if you just hold tight, soon you will be automatically taken directly to the inbox for the YOPmail disposable email address you entered.
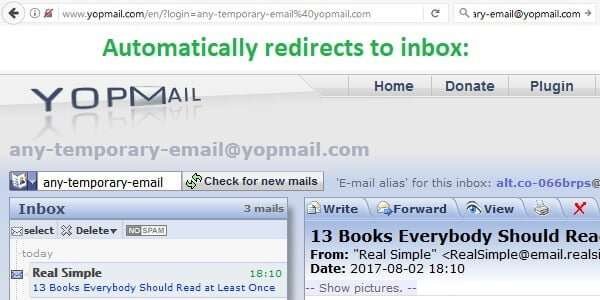
See? Quick, easy, and efficient!
The real beauty comes if you have a second (or third, fourth, fifth…) YOP account you want to check. Because you have the YOPMail plugin, you don’t have to go back to the homepage, enter the next email, and click “Check Inbox” over and over again. Just type the next email in the search bar like you did the first time, and you’ll be taken there in just one click.
Obviously, the YOPmail plugin isn’t an absolute necessity. It won’t do much for most users who only access their accounts casually. But for serious YOPmail users, the browser extension can really streamline the whole experience. It’s free and installs in just seconds, so why not give it a try?
Save
